Are you ready to dive headfirst into some thrilling home improvement? Today we are going to talk about how to install garbage disposal flanges easily. You do not need to hire a plumber or a craftsman to do this. All you will need is some patience, a touch of luck, and the proper steering. By completing this task, you will no longer need an expensive plumber, however, you will also have the pride that comes with growing new abilities.
Table of Contents
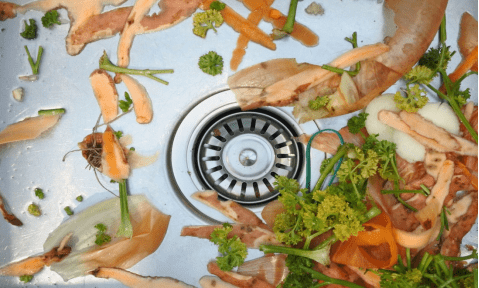
What is a Garbage Disposal Flange
It includes the flange itself, a gasket (a type of seal to prevent leaks), a backup flange, and a mounting ring. In some disposers, a thin rubber gasket is also included to be used under the sink flange. Each component plays a key part in ensuring the system’s efficient operation.
Importance of a Garbage Disposal Flange
The Role of the Flange
The disposal flange is the main point of contact between your sink and the disposal. Its task is to deliver garbage effectively and without delay to the disposal. It cuts down the risk for clogs, leaks, or mishaps, a correctly installed flange guarantees that even the toughest of food scraps find their way from your sink down into the disposal without causing any leaks along the way.
Making Maintenance Easier
With the flange in place, troubleshooting and maintaining your rubbish disposal on an everyday foundation will become easy. Acting as a removable seal between the sink and the disposal, the flange can easily be repaired or replaced. If any issues develop within your garbage disposal, simply remove the flange, conduct your maintenance, and then reattach.
Ensuring Longevity and Efficiency
By introducing a robust seal between the sink and the extractor, a well-placed flange can extensively increase the life of your garbage disposal. It is not just about preventing leaks, but also about reducing wear and tear caused by wrongly-oriented waste entering your disposal. Adding a rubber gasket under the flange, as is commonly done, can further enhance this sealing for increased efficiency and longevity.
Working with Various Systems
Whether it is a 3-bolt mount disposer or an EZ Mount by Waste King, a flange fits seamlessly with the popular mounting systems and ensures your disposal unit and sink work together like a well-oiled machine. Even if you are planning to install a garbage disposal without a dishwasher attached, a flange still ensures tight seals and smooth operation.
Choosing the Right Garbage Disposal Flange for Your Sink
Installing the right garbage disposal flange is critical to make certain that it works nicely and correctly. Some factors to keep in mind whilst selecting a garbage disposal flange, are the stuff your sink is made of, the size of your drainage hole, and the form of rubbish disposal device you ought to install.
Assessing Sink Material and Flange Compatibility
First things first – the material of your sink plays a major role in determining the proper garbage disposal flange. Stainless steel sinks work excellently with flanges of the same material, while porcelain sinks pair well with brass flanges. The compatibility between the sink material and the flange matters because it impacts the overall effectiveness, durability, and life span of both components.
Determining Drain Hole Size and Flange Fit
Apart from the accessories, you might want to check the dimensions of the drain hole on your sink. An ordinary sink drain hole is about 3 to 5 inches in diameter, but it is critical to measure yours carefully to be certain. The garbage disposal flange you pick have flawless for a perfect watertight set up.
Evaluating the Type of Garbage Disposal System
Lastly, the type of garbage disposal system you intend to install significantly influences your choice of flange. Popular mount systems include the standard 3-bolt mount and the EZ Mount by Waste King. These systems require specific flanges, and using the correct one is crucial for a secure connection, which ensures your garbage disposal operates efficiently.
Essential Tools You Will Need for the Installation Process
Installation of a garbage disposal flange requires some necessary tools and materials to ensure a smooth, safe, and successful process. Having everything you will need beforehand can save you time, effort, and unnecessary confusion. Some of the items listed may sound technical, but fear not! They are mostly common tools for any DIY plumbing project. Once you have everything, you are ready to roll!
Tools and Materials
The primary tools have a specific role in making your installation easier. Here are the essential ones you will need:
Plumber’s Putty
This powerful sealing compound is crucial for preventing leaks. You will be using this around the sink flange during installation. You could also use silicone sealant as an alternative, especially for porous sink surfaces like granite or marble where standard putty might stain.
Screwdriver
A common tool for tightening screws in the mounting assembly. Make sure to have one handy.
Self-Service Wrench
This specialized tool provides leverage when tightening or loosening the mounting assembly. It can be a real game changer for ensuring your unit is fully secure and aligned.
Additional Support
Depending on the weight of your disposal and the specifics of the installation, you might consider additional support. You can use an upside-down bucket, a jack, or even your knee for support when installing heavier disposers or dealing with awkward installations.
Accommodating Mounting Mechanisms
If you are using an EZ Mount system for installation, remember this is designed to simplify the process. Your disposal will come with a fiber gasket, support ring, metal mount ring, and rubber cushion mount which are all parts of this assembly and make your job that much easier.
Step-by-Step Removing the Old Garbage Disposal Flange
Let us begin this adventure with the stuff you should do when removing a disposal flange. We are here to guide you through each step to make this method as easy as a pie.
1. Disconnecting Power and Water Sources
You must ensure your safety before starting. You will wish to disconnect your present garbage disposal unit from both power and water supplies. You can do this by turning off the switch, preferably at the circuit breaker to ensure that nothing happens unexpectedly and unplugging the unit. Remember, safety comes first in every DIY project.
2. Loosening the Drain Pipe and Dishwasher Hose
Next, focus on the connections that bind your unit with your kitchen essentials – the drain pipe and the dishwasher hose. Use your limited set of tools effectively and disconnect both. Disconnecting these fittings will make the task of unmounting the garbage disposal unit a breeze.
3. Unmounting the Garbage Disposal Unit
Take out your self-service wrench or hex key, and get ready for some real action. You will approach this task with the main goal of unmounting the old garbage disposal unit. If you are having difficulty in dislodging the unit, reach out for your trusty screwdriver. With a bit of leverage applied at the right spots, your unit will be ready to leave its comfort zone.
4. Removing the Electrical Connections
Now, let us move on to the electrical aspects of your garbage disposal unit. You need to remove the electrical cord from your old garbage disposal unit before proceeding further. Grab your handy screwdriver and loosen the plate that covers the electrical connections. Once done, carefully remove the cord. Remember, maintaining caution with wiring is fundamental to your safety.
5. Performing the Final Extraction
At this point, you are almost at the finishing line. You now have to extract the old garbage disposal flange. Use proper leverage with your screwdriver if essential, or maybe a bit of gentle hammering can do wonders. Your old garbage disposal flange should now be successfully removed. Take a moment to appreciate your work before moving on to the next step – the installation of a new garbage disposal flange.
Conclusion
And there you have it. You have successfully performed garbage disposal flange installation. With your newfound knowledge, you can deftly handle the removal of an old flange, determine the right type and size, and successfully install a new one. Do not forget to make use of important tools such as the plumber’s putty, screwdriver, and self-service wrench to ease your work.
How do I ensure the new flange fits my sink?
Before purchasing a new flange, measure your sink’s drain whole size. This helps ensure the new flange will fit your sink. Also, consider the sink’s material and check for compatibility with the flange.
What to do if the existing drain pipes and tools do not match with the new disposal?
If your drain pipes and tools are incompatible with the new flange, adjustments might be needed, like cutting to match the trap height and disposer’s discharge length. When in doubt, consult a professional plumber.
How to secure the new flange?
After putting the new flange in place, attach the snap ring to the mount to secure it. Then, tighten the bolts evenly. A self-service wrench or screwdriver can be handy for this process.
What to do after securing the flange?
After securing the flange, insert the Quiet Collar Sink Baffle into the sink opening until it snaps into place. Once the unit is mounted under the sink firmly, connect the plumbing. The Tee should connect to the tailpiece and then to the trap.
Is there a detailed reference to guide me through the installation process?
Certain manufacturers, like InSinkErator, provide detailed installation instructions, including video tutorials. These resources could be extremely handy, especially for first-time DIY.